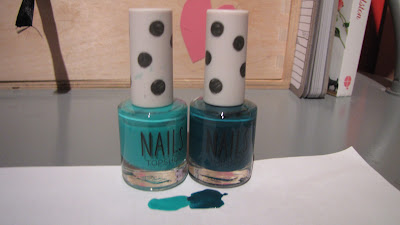
So today I'm going to show you how to create an ombre effect on your nails. Ombre was a huge trend last summer and this is a great way to work the trend is a subtle yet stylish way.
You will need:
- 2 nail polishes
- base coat and top coat
- a sponge
- a pair of scissors
- nail polish remover
So this takes a little time but it is quite simple to create, and can be done using some many different colour combinations.
To begin with, clean your nails using nail polish remover- I'm using these nail polish remover pads from Boots.
So next you need to decide what colour nail polishes to use. I like to use the same colour but in different shades, however you could use whatever colours you like (try to contrasting ones for a bold look). For this I'm using two Topshop nail polishes- Green Room and Jewel in the Crown, which are two shades of green.
Next apply a basecoat, I'm using Jessica's Reward Base Coat for normal nails.
Next you'll need a sponge- just a normal sponge you would wash with (I bought mine from a supermarket for about 50p). Then using a marker pen, draw a grid onto your sponge and then cut it up into loads of pieces. You'll probably only need one piece for all of your nails, but it's useful to have a lot of pieces so you can practise or do it again and again.
Now on to the nails! Once your basecoat is dry, paint your nails completely using the lightest shade of polish- I like to do two coats with this nail polish so I get a strong even colour.
Now on a piece of paper, pour out a little of the darker shade of nail polish, and dip the edge of your piece of sponge in it.
Alternatively at this point, you could just paint some polish onto the sponge using the brush, but I find it much quicker and easier pouring some out.
Now, using the sponge, dab the polish over the bottom half of your nail. It doesn't have to be perfect, and it should look a little blobby and a little patchy- this is how we want it.
Repeat that for all your nails and let it dry.
Now take your sponge, and start dabbing again, but this time just on the bottom quarter of your nail. This should make it darker and create a gradient.
You may be thinking at this point that it look just like 3 stripes of colour, and so this is where your topcoat come in. Once the polish is pretty much dry (doesn't have to be perfect, as long as it's not sticky it should be fine) apply a clear topcoat all over the nail (I'm using Jessica's Brilliance topcoat) and you should start to see the colours blending together, so the line between each colour is soft.
So there you have your finished ombre nails! I hope you like them, and give them a go- it's so simple.
Variations:
- use one colour nail polish and just make it get darker the further down your nail you go
- use one base colour and then glitter polish to do the ombre effect
- use a fine glitter topcoat.
Go wild, and feel free to send me some pictures of your attempts, (by twitter or email) I'd love to see them!
Olivia Ellen XXX
@oliviaellen97


No comments:
Post a Comment